Watermarking and OCR-ing Your Images
In the process of my dissertation research I have accumulated over 2,000 images, nearly all scans of documents. One goal of my dissertation is to make these documents open and available (where appropriate) in an Omeka repository. In order to more correctly attribute these documents to the archives where I got them, I need to place a watermark on each image.
I also need the content of the documents in a format to make it easy to search the text.
The tools to do each of those steps are readily available, and easy to use, but I needed a script to put them together so I can run them on a handful of images at a time, or even hundreds at a time.
I’ll walk through the problem and show the steps I used to solve it.
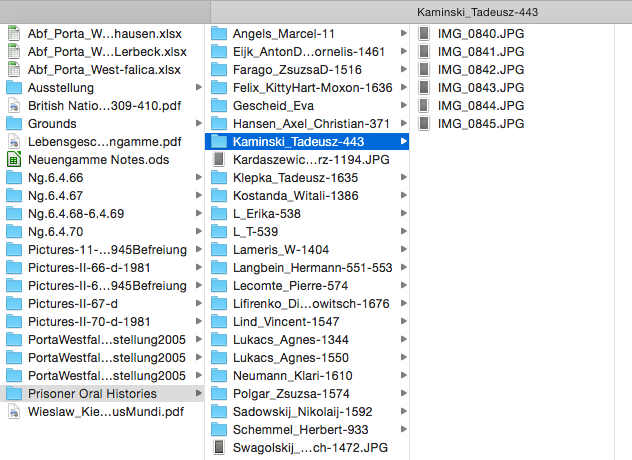
When at the Neuengamme Concentration Camp Memorial Archive near Hamburg in the summer of 2013, I found about 25 testimonials of former inmates. In most cases I took a picture of the written testimonial (the next day I realized I could use their copier/scanner and make nicer copies). So I ended up with quite a number of folders, each containing a number of images.
So the goal became to watermark each image, and then run an OCR program on each image to get the contents into plain text.
Watermark
There are many options for water marking images. I chose to use the incredibly powerful ImageMagick tool. The ImageMagick website has a pretty good tutorial on adding watermarks to single images. I chose to add a smoky gray rectangle to the bottom of the image with the copyright text in white.
The image watermark command by itself goes like this:
width=$(identify -format %w "/path/to/copies/filename.png"); \
s=$((width/2)); \
convert -background '#00000080' -fill white -size "$s" \
label:"Copyright ©2014 Ammon" miff:- | \
composite -gravity south -geometry +0+3 - \
"/path/to/copies/filename.png" "/path/to/marked/filename.png"
This command can actually be run on the command line as is (replacing the copyright text and paths to files of course). The command is actually three commands and should be written on one line, but for ease of reading, the backslash () denotes where I split the commands onto the next line. I’ll explain the command below.
The first line gets the width of the image to be watermarked and sets it to the variable “width”.
width=$(identify -format %w "/path/to/copies/filename.png"); \
The second line gets half the value of the width, and sets it to the variable “s”.
s=$((width/2)); \
The third line starts the ImageMagick command (and is broken onto several lines using the \ to denote that the command continues on the next line). The code from convert to the pipe | creates the watermark, a dark grey rectangle with white text at the bottom of the image.
convert -background '#00000080' -fill white -size "$s" label:"Copyright ©2014 Ammon" miff:- | \
The rest of the command tells ImageMagick where to put the watermark, the original image to use, and where to put the image with a watermark and what to call it.
composite -gravity south -geometry +0+3 - \
"/path/to/copies/filename.png" "/path/to/marked/filename.png"
The results can be seen on the following image.
OCR
Most of the images I have are pictures of typed up documents so they are good candidates for OCR (Optical Character Recognition), or grabbing the text out of the image.
OCR can be done using a program called tesseract.
The tesseract command is relatively simple. Give it an input file name, an output file name, and an optional language.
tesseract "/path/to/input/file.png" "/path/to/output/file" -l deu
This will OCR file.png and create a file named file.txt. The -l (lowercase letter L) option sets the language to German (deu[tsch]).
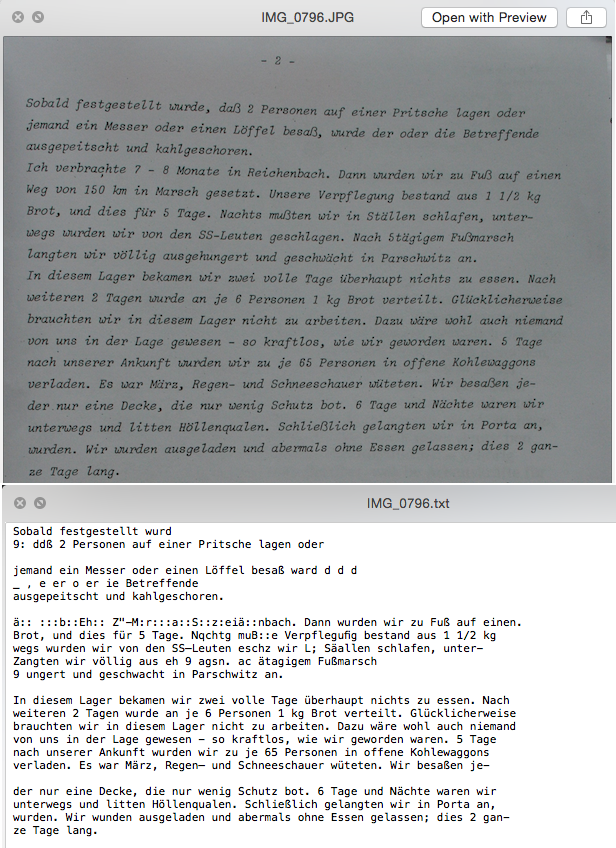
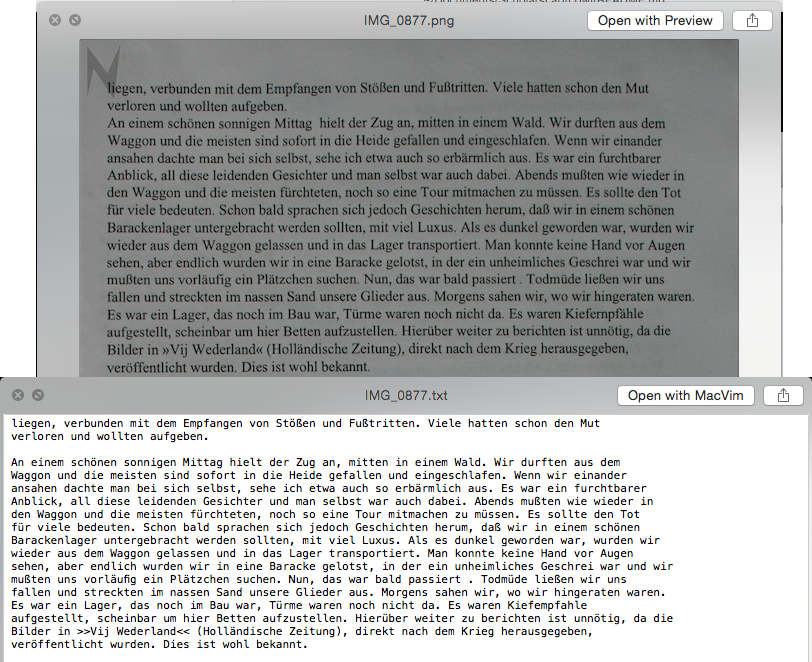
Below are two examples. Note that the translation is not letter-for-letter perfect, but the software does a good job.
The benefits of OCR’ing documents is apparent when needing to search for specific details.
Now that I have each page OCR’ed, I can do searches on these files, where otherwise I had to read through the entire PDF page by page or look at every single image. For example, today I’m looking through a 50+ page PDF transcript of a survivor interview to find the parts where she talks about her experiences at the Porta Westfalica camp. While I will read through each page individually, I can get a quick sense of where I should be looking by doing a search on the OCR’ed pages to find out where the term ‘Porta’ is found.
Now I know that at least on pages 47 and 48 is where I’ll find some description of her time in Porta Westfalica.
The Script
Imagine typing in those commands for every single image that I want to OCR and watermark. That would take way too long, and computers are really good at doing repetitive tasks, so I’ll let the computer take care of that. That’s where writing a script comes in very handy. A script is basically a file that tells the computer a bunch of commands to execute. In this case the commands are the ImageMagick and tesseract commands; with some logic thrown in to find the right files and put the results in the right place.
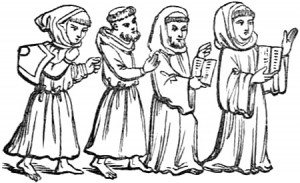
The mascot is a crop from this image of monks (found in a 1911 book about characters of the Middle Ages, SCENES & CHARACTERS OF THE MIDDLE AGES, By the Rev. EDWARD L. CUTTS, b.a. LATE HON. SEC. OF THE ESSEX ARCHÆOLOCICAL SOCIETY, http://www.gutenberg.org/files/42824/42824-h/42824-h.htm#Page_39). The name ‘cowl’ (Copy, OCR, Watermark, Language) is inspired by monks, whose work it was to copy and transcribe documents (similar to what this script does).
Originally, I wrote a script using BASH, a shell scripting language specific to Unix based computers. That script is available at my GitHub repo: https://github.com/mossiso/ocr-watermark
A nice write up on how to use this script in its original format (and the basis for the content of this post) is found on my dissertation blog: http://nazitunnels.org/2014/11/watermarking-and-ocring-your-images.html The most up to date steps will be at the GitHub repo linked above. I plan to update the BASH script to behave the same way as the below-detailed script, so things will definitely change in the future.
I was able to rewrite the script in a more universally available language; Ruby. That script is available here: https://github.com/mossiso/cowl
Here is how to use the Ruby script. The most up to date version of these steps is at the GitHub repo linked above.
Set up
This assumes you already have ruby, git and bundler installed.
-
Installing Ruby: https://www.ruby-lang.org/en/documentation/installation/
-
Installing Git: http://git-scm.com/book/en/v2/Getting-Started-Installing-Git
-
Installing bundler: http://bundler.io/#getting-started
-
NOTE: At the moment, you should also have tesseract and GhostScript installed. There are ruby gems to handle these, but they are not playing nicely yet, so these commands are called from the command line for now.
-
Instructions for installing tesseract: https://code.google.com/p/tesseract-ocr/wiki/ReadMe
-
Instructions for installing GhostScript: http://www.ghostscript.com/doc/9.15/Install.htm
- If you’re on a Mac, it is highly recommended that you use homebrew (http://brew.sh/) or some such thing for installing programs
-
Download the repo in your home directory:
<code>git clone https://github.com/mossiso/cowl
</code>
This creates a folder called cowl and puts four files into it. Now change directories into the cowl directory.
<code>cd cowl
</code>
Get the required gems by running bundler.
<code>bundle
</code>
Edit the cowl file to change the default copyright text. Change the line (line 21 in the image below) that looks like this:
<code>options.mark_text = "Copyright ©2014 The Marvellous and awesome Me"
<a href="http://static.scholarslab.org/wp-content/uploads/2015/02/edit-copyright1.png"><img src="http://static.scholarslab.org/wp-content/uploads/2015/02/edit-copyright1.png" alt="edit-copyright" height="418" class="aligncenter size-full wp-image-11562" width="886"></img></a>
</code>
Examples
In your terminal program, enter into the directory where you have images.
<code>cd /path/to/images/
</code>
Run the cowl command (if you ran the git command in your home directory, and your home directory is /home/billy)
<code>ruby /home/billy/cowl/cowl
</code>
Running without any options will create a copy of the images, OCR them, put a watermark on the copies, and combine them all into one PDF.
The default text for the watermark is hard coded in the cowl script. You can change it there, or use the -t option.
<code>ruby /home/billy/cowl/cowl -t "Copyright ©2015 Billy Jorgenson Photography"
</code>
To change the language used in the OCR to English (since most of my documents are in German, I hard coded it to use German :) ).
<code>ruby /home/billy/cowl/cowl -l eng
</code>
If you have a PDF file to start with, run the command with the -g option. This will break the PDF into PNG images, then make copies, run the OCR, put on the watermarks, and finally create a new PDF with the watermark on each page.
<code>ruby /home/billy/cowl/cowl -g
</code>
You can also use the tool as a way to make copies of your images (with or without a watermark).
<code>ruby /home/billy/cowl/cowl -nop # no watermark, ocr, or PDF

ruby /home/billy/cowl/cowl -op # no ocr or PDF
</code>
If you run into any issues or have an idea for an upgrade, feel free to add an issue to the GitHub repo, or even send me an email.
Happy cowl’ing!


